
Custom Status Options
Setting up your custom status options is a good way to have a visual representation on-screen to prioritise your documents in your own way.
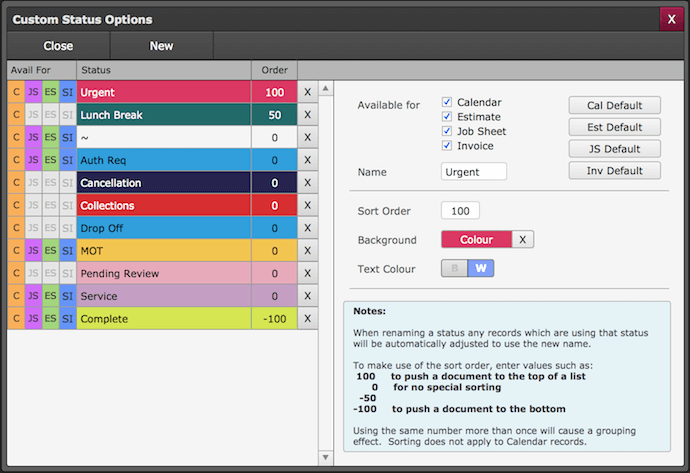
Adding A New Custom Status
Go to Admin > Customisation > Custom Status Options
Then create your own status by;
- Click - New
- Choose where this status is available to use;
- Calendar
- Estimate
- Job Sheet
- Invoice - Enter - Name for the new status option
- Sort Order - This determines what priority your status appears on screen ( 100 = High Priority / -100 = Low Priority )
- Background - The colour displayed to distinguish between each status option
- Text Colour - Black/White ( Choose the best contrast against the colour selected )
Your new status is now set up and ready to be selected against the options as requested.
Print Back to other articles