
Sage Exports
For a list of compatible Sage products, click here
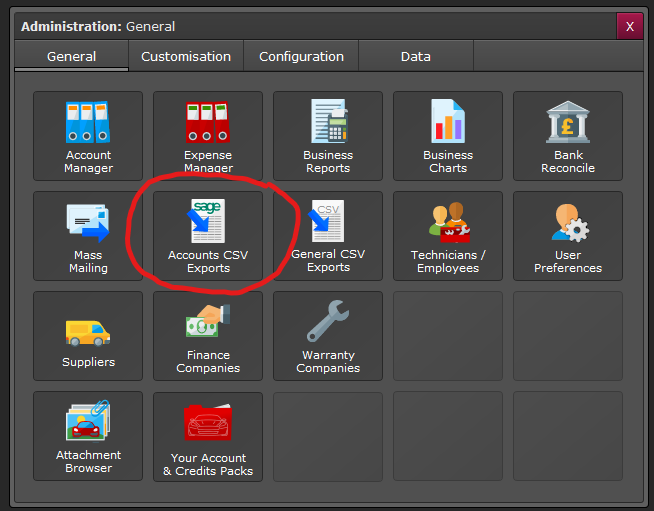
Go to Admin > General > Sage Exports
Then go to each nominal code section to enter your nominal codes to match Sage;
- Sales Nominals
- Expense Nominals
- Payment Nominals
Once you have all the correct nominal codes set up we suggest going to the settings tab on the main Sage Export menu (far right). Please read through the settings options and make any adjustments you require. You may only need to do this before your initial Sage Export as these settings will probably remain similar for future exports.
You have now set up your Sage Export settings and nominals ready to perform your first Sage Export from GA4.
Performing A Sage Export
Go to Admin > Accounts CSV Exports
Depending on what export you want to perform will determine what box you will choose;
- Export Sales - To current date (Today's Date)
- Export Expenses - To current date (Today's Date)
Then you have the option to select a month ending;
- Export Sales - To Month End (Month Selected)
- Export Expenses - To Month End (Month Selected)
Once you have chosen the period you want to export you click on the corresponding button. A box will appear letting you know how much information is included in the export.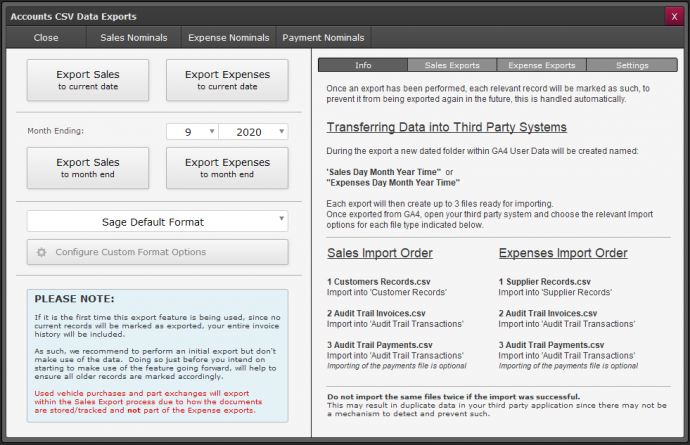
Your export has now been sent from GA4 and is available in your Sage Exports Folder found;
- PC - C:\GA4 User Data\Sage Exports
- MAC - MacintoshHD/Documents/GA4 User Data/Sage Exports
Importing Data To Sage
Within the Sage Exports folder will be dated folders which depending on what export you have performed will contain the following files;
Sales Import Order
The files within the folder are;
- Customers Records.csv
- Audit Trail Invoices.csv
- Audio Trail Payments.csv
Expenses Import Order
The files within the folder are;
- Supplier Records.csv
- Audit Trail Invoices.csv
- Audit Trail Payments.csv
(This would result in duplicate data since there is no way within Sage to detect and prevent duplicate data)
Proceeding To Sage Import
Make sure you have backed up your Sage first.
- Go to File > Import
- This will present you with the Sage Data Import Wizard, click on next to choose the data type.
- You will then be asked to choose the data type for importing. First, you would choose Customer Records, followed by clicking Next.

- Next, you will be asked the format type - Choose CSV.
Make sure that the "First Row Contains Headings" is ticked.

- Then click on browse to locate the Customers.csv file in the GA4 User Data\Data Exports folder.
- You will be shown the Sage mapping fields section, each field should now be mapped correctly (Because the "First Row Contains Heading was ticked on the previous screen no mapping should be needed unlike GA3). See image below;

- Proceed - Next. This next screen shows you the information you are wanting to import into Sage, check the details are correct then - Import.

- The window will show all the records that have been imported. You have now successfully imported your Customers Only.
- Next to import your Audit Trail Invoices.csv, Go to - File > Import.
- Choose - Audit Trail Transactions.
- Next, you will be asked the format type - Choose CSV. Make sure that the "First Row Contains Headings" is ticked.
- Then click on browse to locate the Audit Trail Invoices.csv file in the
GA4 User Data\Data Exports folder - You will be shown the Sage mapping fields section, each field should be mapped correctly.
- Proceed - Next. This next screen shows you the information you are wanting to import into Sage, check the details are correct then - Import.
- The window will show all the records that have been imported. You have now successfully imported your Invoices.
- Finally, to import your Audit Trail Payments.csv, Go to - File > Import.
- Choose - Audit Trail Transactions.
- Next, you will be asked the format type - Choose CSV. Make sure that the "First Row Contains Headings" is ticked.
- Then click on browse to locate the Audit Trail Payments.csv file in the
GA4 User Data\Data Exports folder - You will be shown the Sage mapping fields section, each field should be mapped correctly.
- Proceed - Next. This next screen shows you the information you are wanting to import into Sage, check the details are correct then - Import.
- The window will show all the records that have been imported. You have now successfully imported your Payments Only.
The sage import is now complete.
Print Back to other articles